
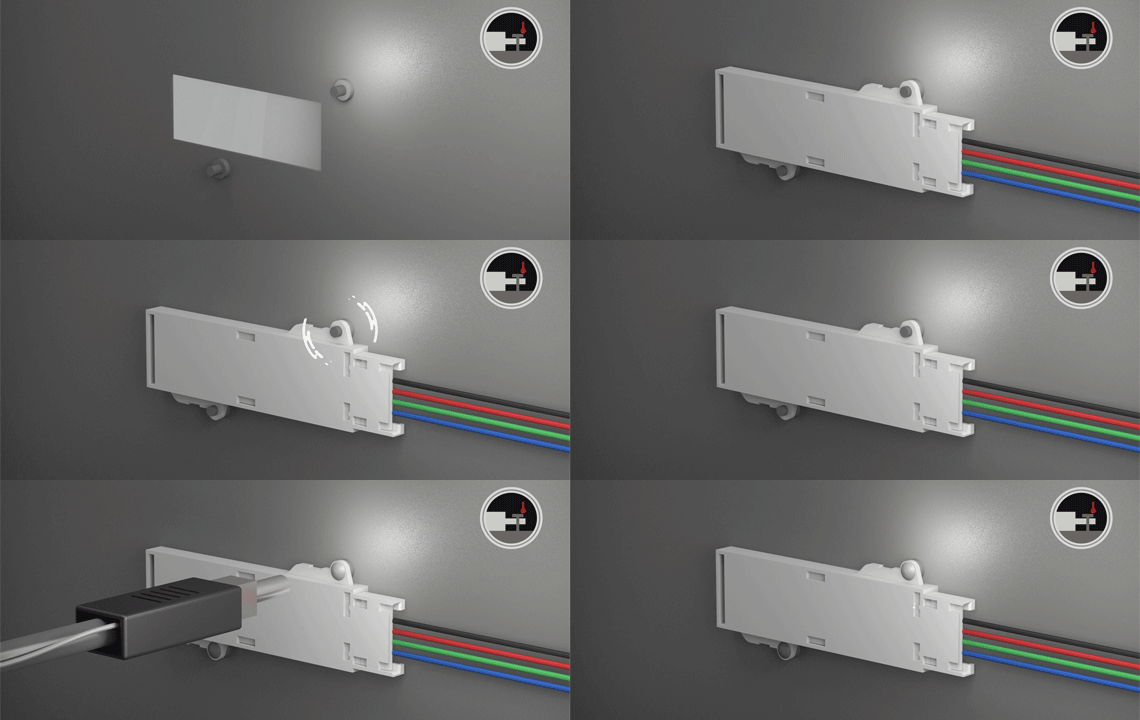
Option #1 - Heat Staking, Heat Riveting and Ultrasonic Fixing
With this mounting method, the module is first of all put in position using two plastic locating pins built into the customer application. The final connection is achieved using a joining procedure such as heat staking, heat riveting or ultrasonic fixing.
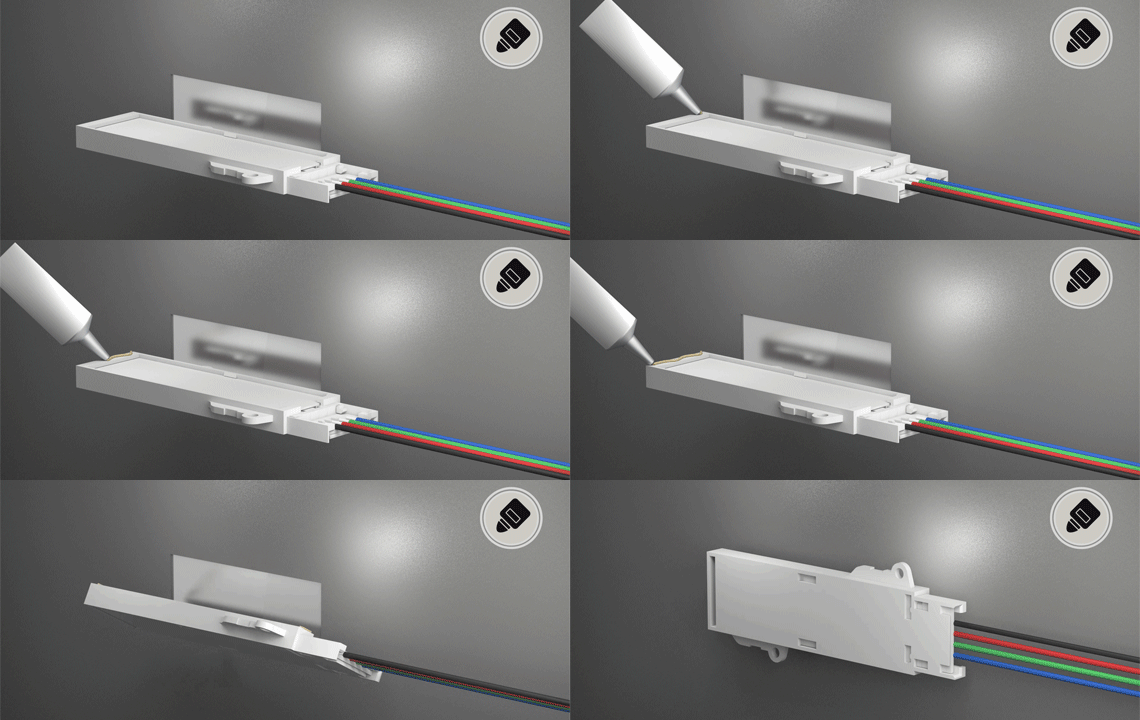
Option #2 - Glue Mounting
The module is attached to the customer application using a glue applied to its outer edge. The choice of glue is dependent on the ambient conditions and the combination of materials of the area lighting module and the the application housing.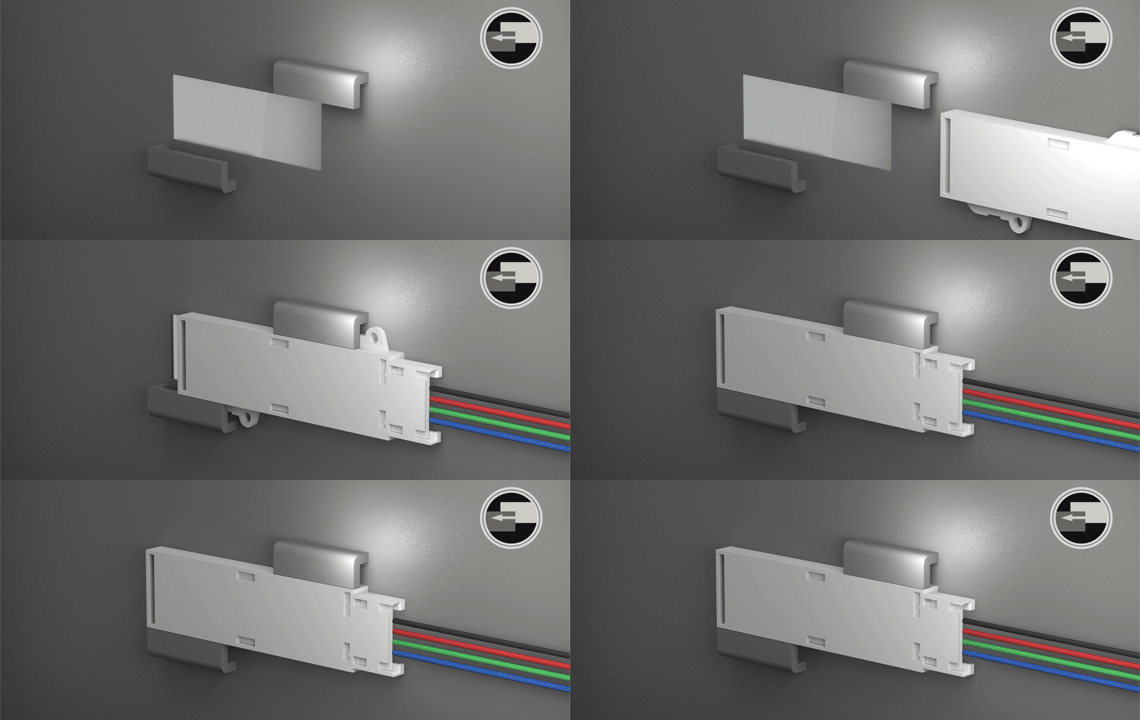
Option #3 - Slide-In Mounting
The MENTOR area lighting module is secured by slipping it into place using the mounting tabs built into the sides of the module. Securing brackets need to be designed into the customer application to mate with the tabs.
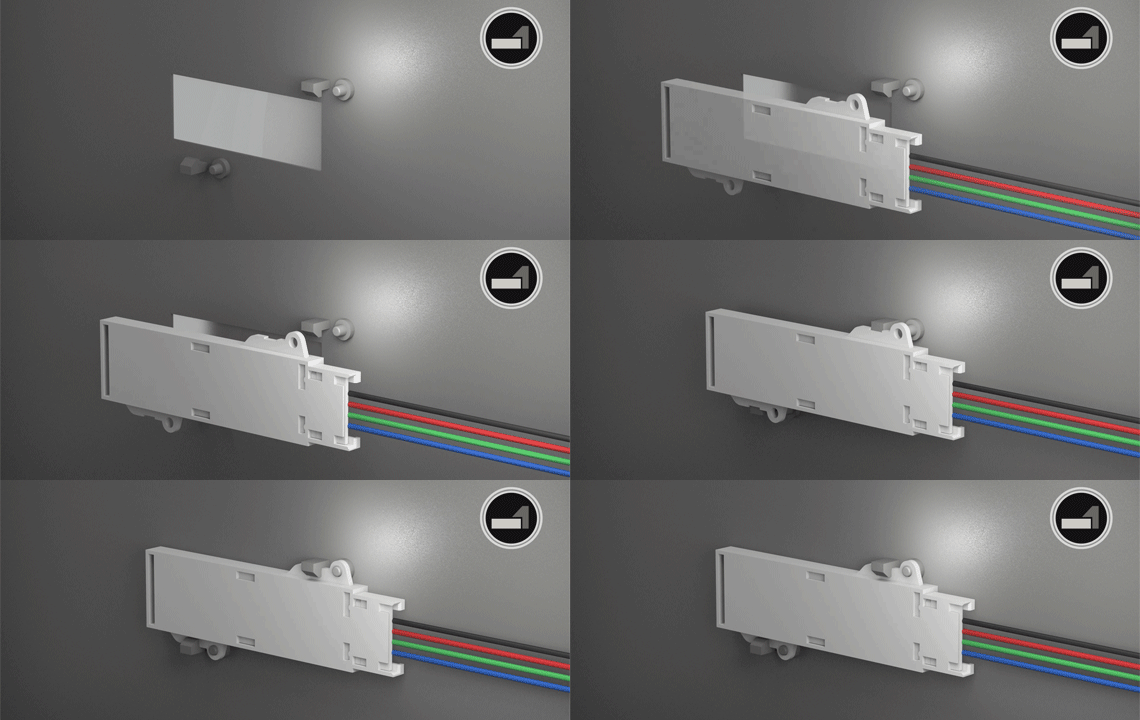
Option #4 - Snap-In Mounting
The module is secured by the locking hooks which need to be designed into the end-product. For ease of installation, we recommend the use of guide pins to define the precise position for snapping into place.

Option #5 - Screw Fixing
The area lighting module is screwed onto the final application using the holes on the mounting tabs. Using this mounting method, corresponding screw sockets or screw securing plugs need to be designed into the final application.
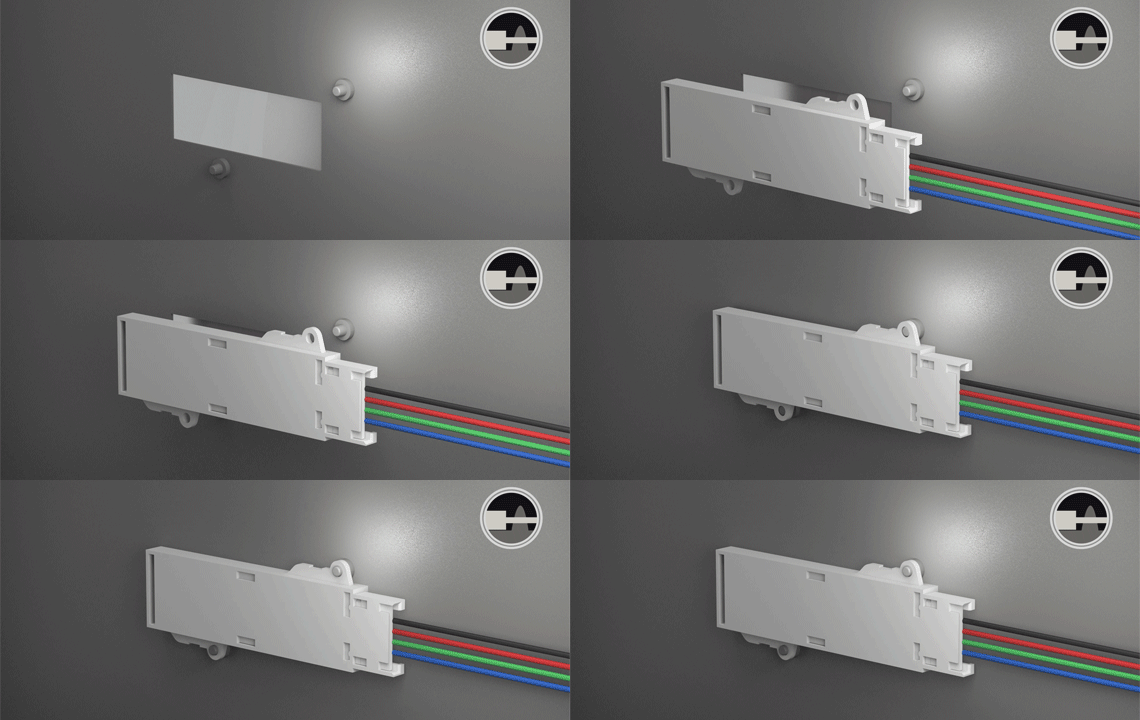
Option #6 - Push-Fit Mounting
Using the mounting holes on the tabs, the module can be pressed onto tapered spigots on the customer application. Alternatively, expanding heads can be built into the application to provide a positive engagement.


